Comprehensive Overview of Dimensional Shingles

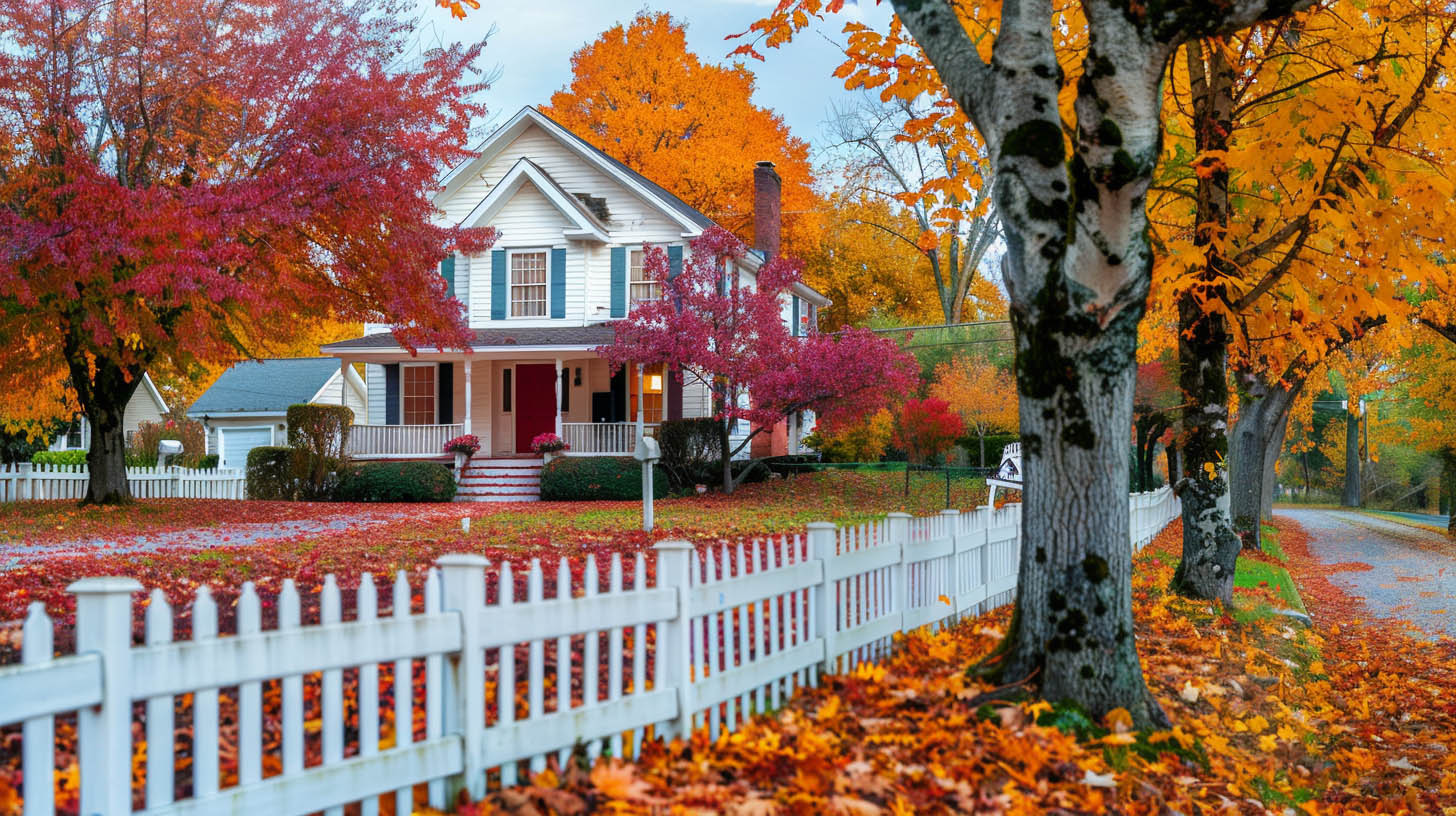
Exploring Dimensional Shingles for Modern Homes

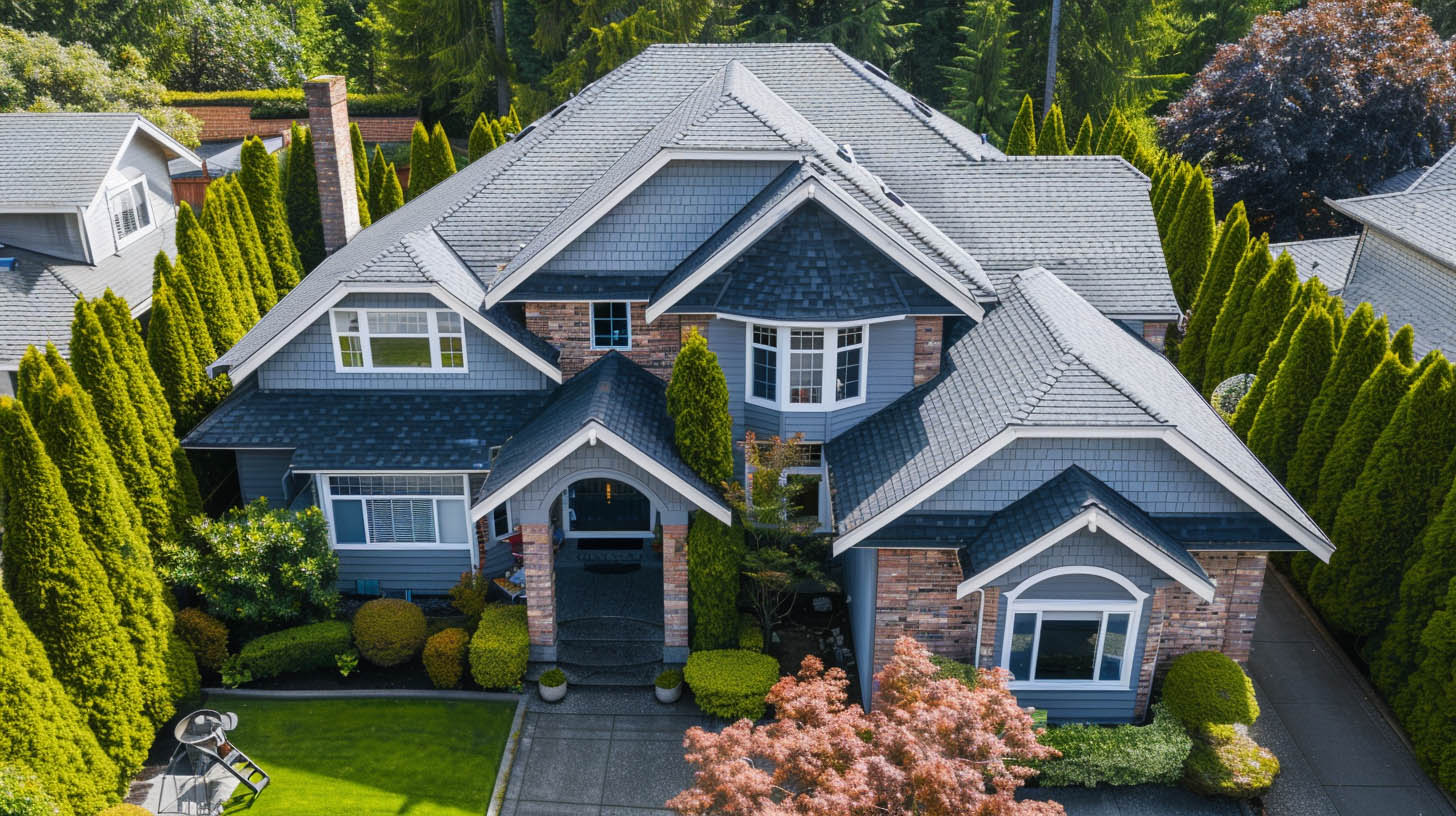
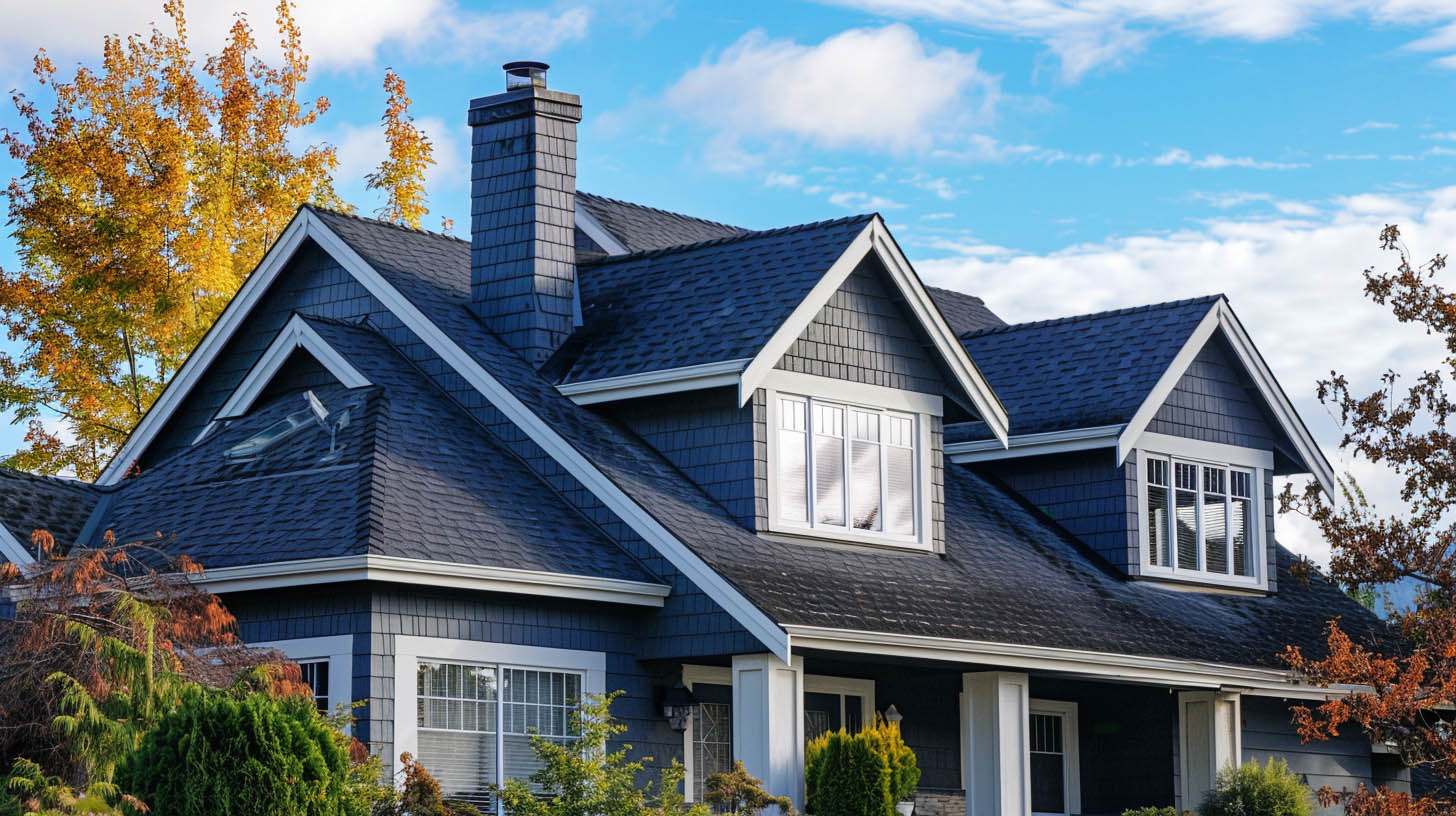
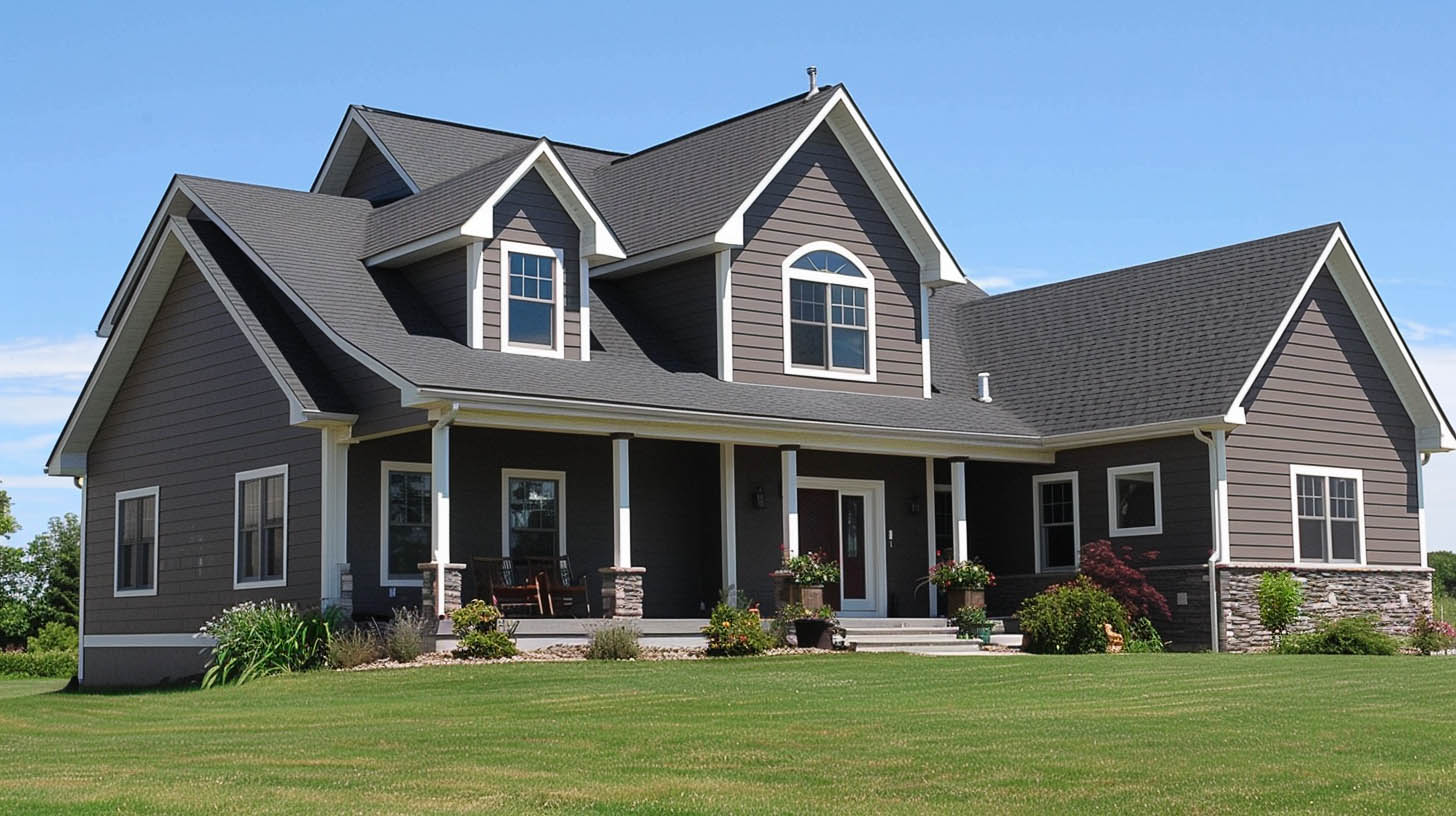
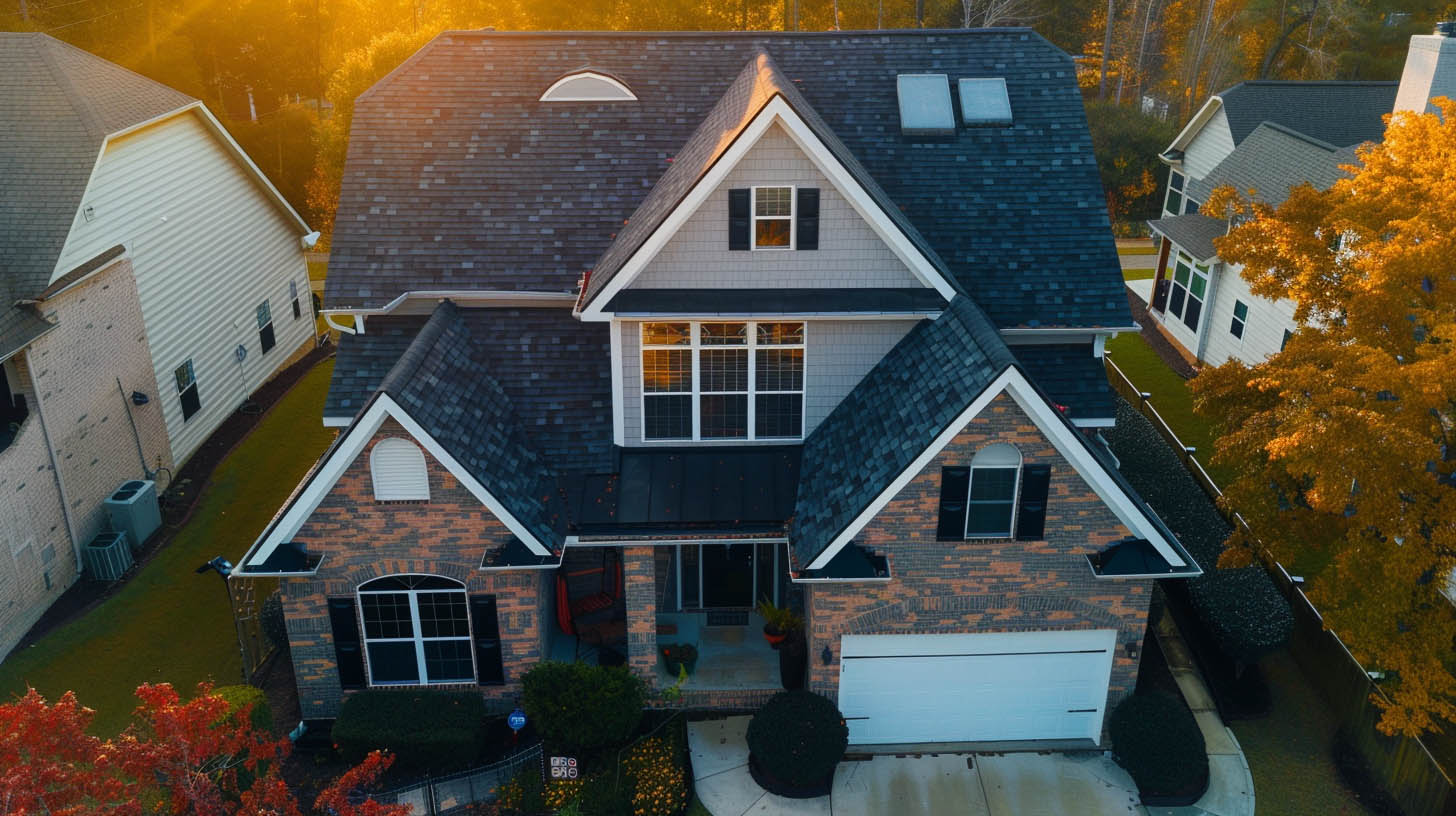
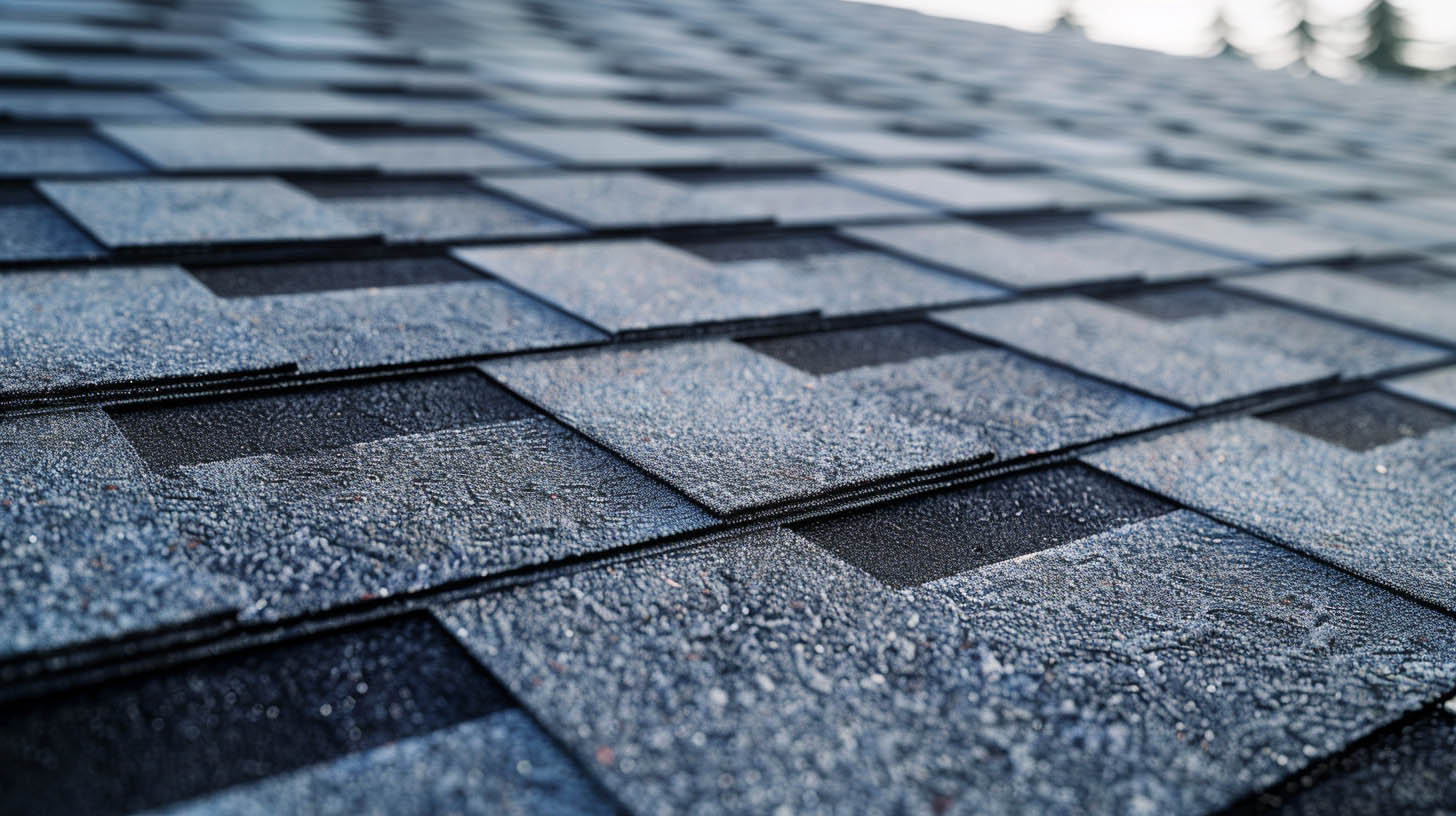
Dimensional shingles have revolutionized roofing aesthetics, offering a sophisticated alternative to the traditional flat appearance of asphalt shingles. These multi-layered shingles are not only more visually appealing but also provide enhanced durability and performance.

What Sets Dimensional Shingles Apart?

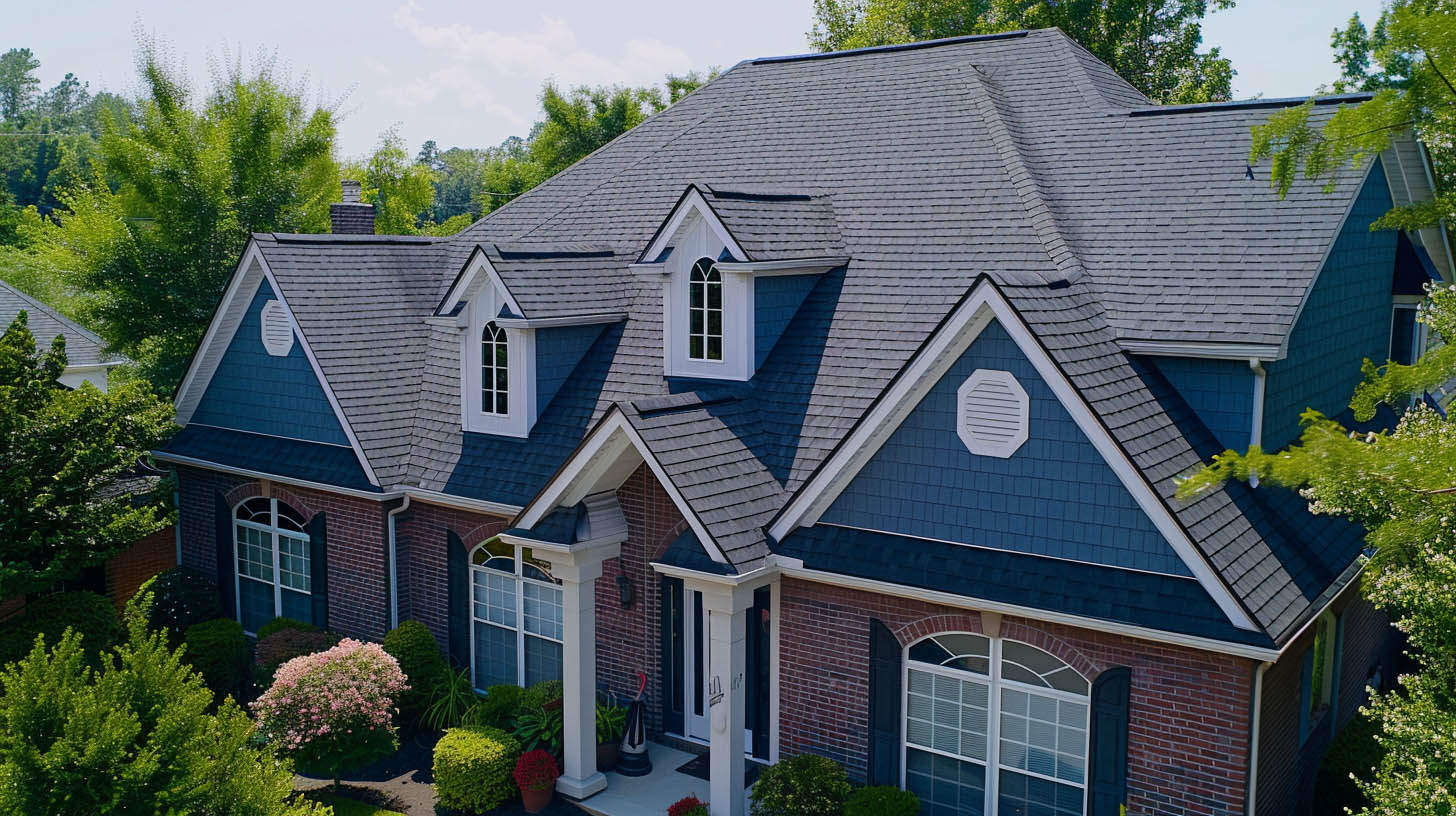
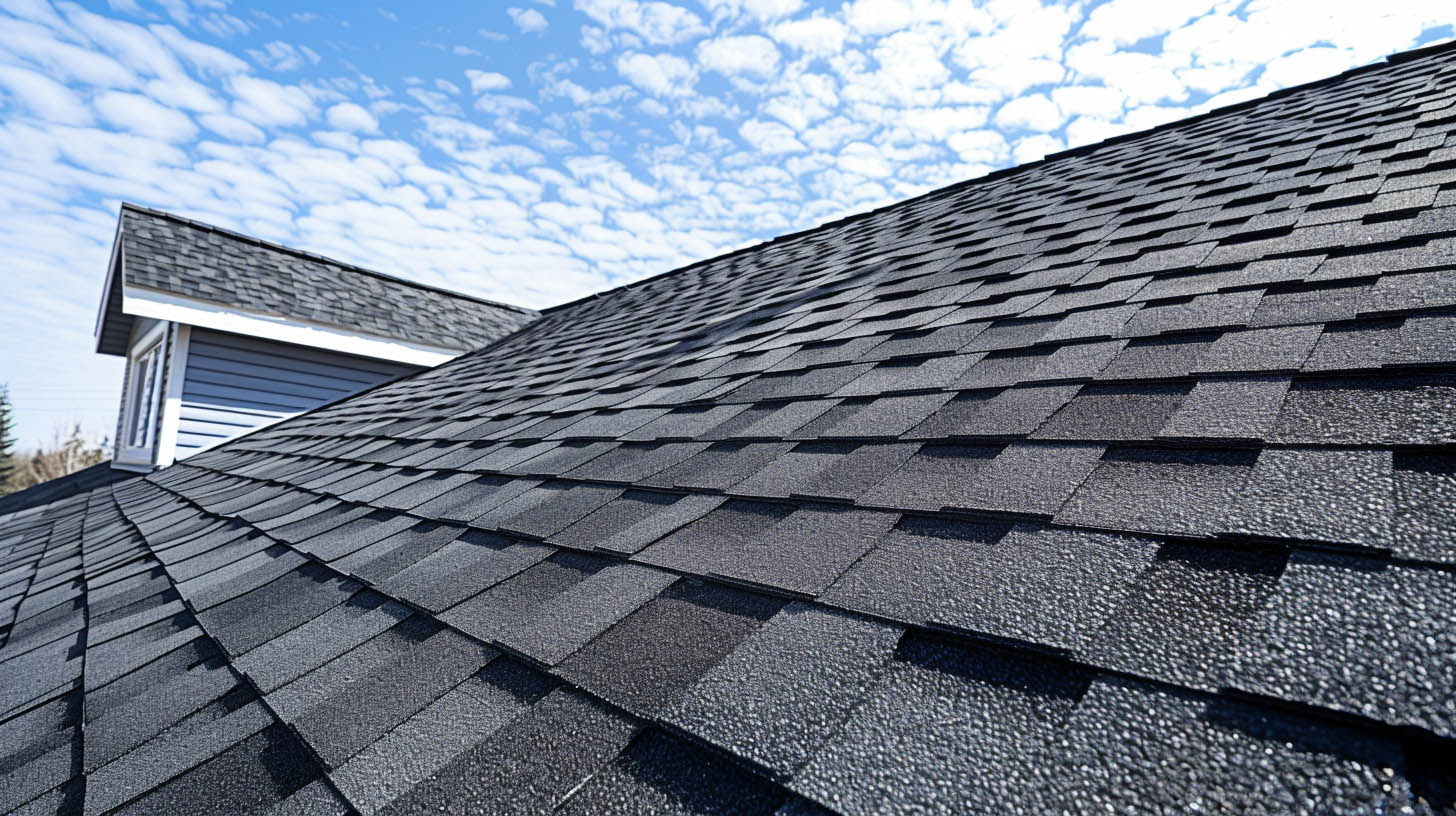
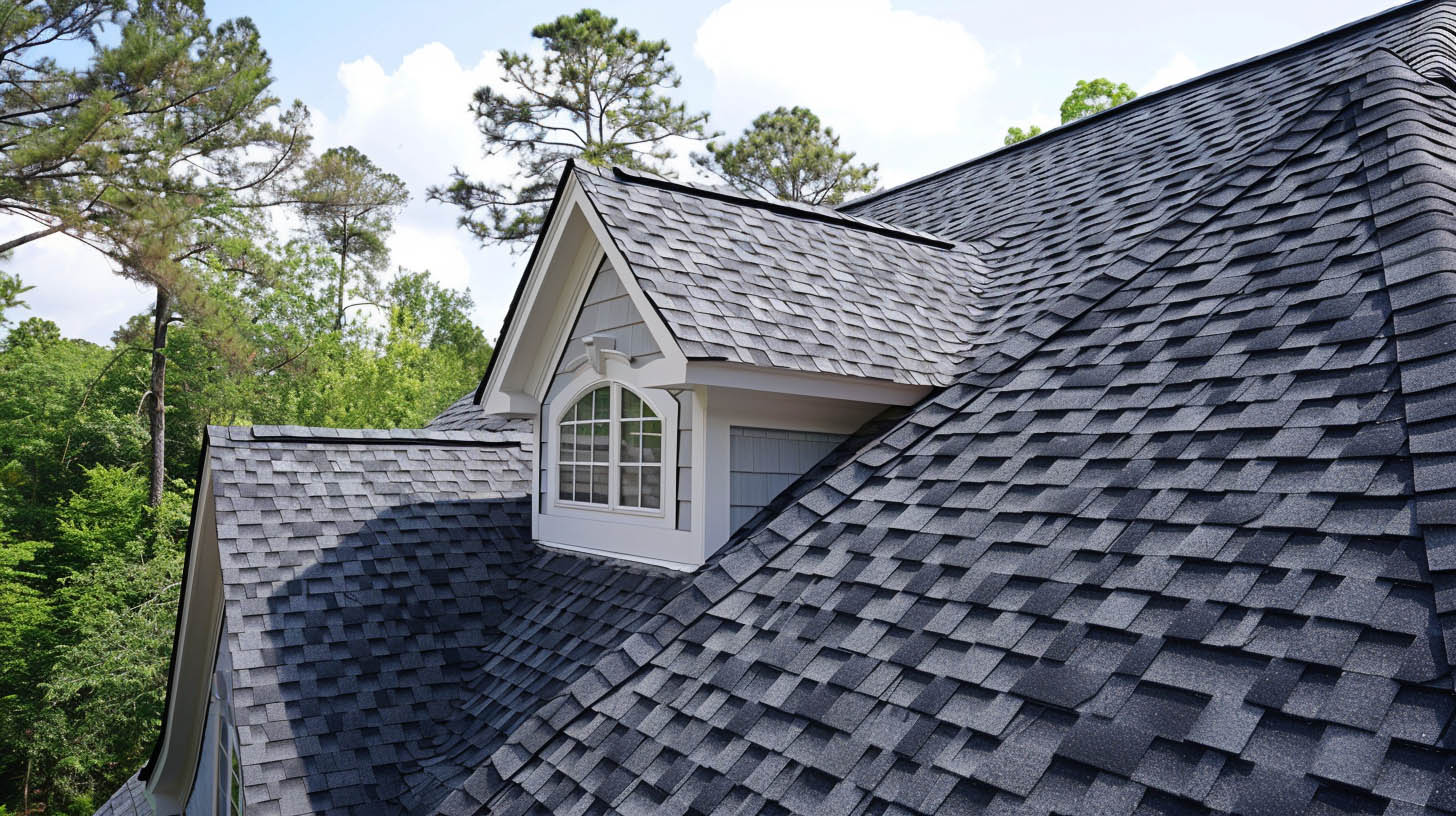
Unlike standard asphalt shingles, dimensional shingles boast a dual-layer construction. This structure imparts a rich texture and depth, mimicking the appearance of natural wood shakes or slate tiles. Their varied size and alignment create dynamic shadow lines, making the roof’s surface more intriguing and refined.

Diverse Styles for Every Home

Manufacturers have expanded the range of dimensional shingles, now including options that resemble old-world, Victorian, or even rugged, dramatic designs. Known also as architectural or designer shingles, these products come with additional ornamental features, such as unique cuts and color blends, to enhance their aesthetic appeal.

Enhanced Performance and Durability

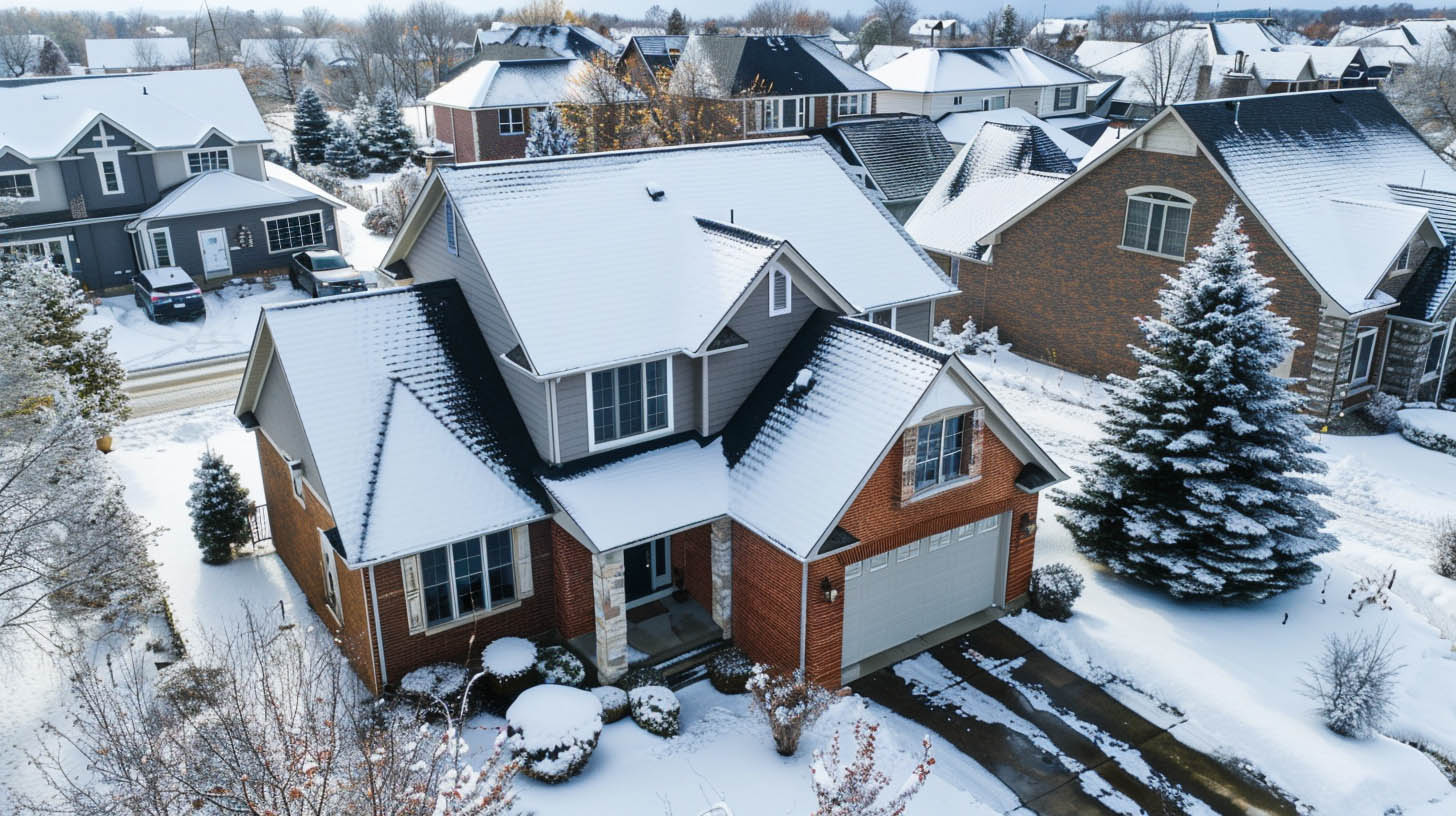
Dimensional shingles are constructed to withstand severe weather conditions, including high winds up to 130 mph and heavy rain, outperforming their traditional counterparts. With potential lifespans reaching 40 years, they are a cost-effective roofing solution, offering extended warranties due to their robust nature.

Cost Considerations

While initially more expensive—about 20% more than traditional asphalt shingles—the long-term benefits of dimensional shingles justify the investment. Prices typically range from $3 to $6 per square foot, depending on the style and quality selected.

Benefits of Upgrading to Dimensional Shingles

  • Aesthetic Variety: A broad selection of styles and colors allows homeowners to achieve a unique look for their roofs.
  • Longevity: These shingles often come with warranties of 40-50 years, reflecting their durability and quality.
  • Structural Benefits: Their heavier construction reduces the likelihood of warping and conceals imperfections in the roof’s structure.
  • Universal Application: Suitable for various roof pitches and types, dimensional shingles are versatile and widely available.

Potential Drawbacks

The main disadvantage is the higher initial cost, which may be a consideration for some budgets. Additionally, the intricate cutouts and organic material composition can make them more prone to algae and mildew, though proper maintenance can mitigate these issues.

Conclusion

For those considering a roofing upgrade, Trojan Roofing in Indianapolis, IN, offers expert guidance on choosing the right dimensional shingles to enhance both the performance and curb appeal of your home. With their substantial benefits, these shingles represent a smart investment for long-term home improvement.

If you want to know more about estimating the cost of residential roof replacement, click here.

Estimating the Cost of Residential Roof Replacement

Understanding Residential Roof Replacement Costs

The cost of replacing a residential roof varies widely based on several factors, including the size and type of your roof, the materials chosen, and regional labor costs. Here, we delve into the essential components that determine how much you might spend on a new roof.

Key Factors Influencing Roof Replacement Cost

  • Size of the Roof: Roofing costs are often calculated by the “roofer’s square” (a 10×10 foot area). The total area, including overhangs and complexities such as dormers or valleys, will significantly affect the final price.
  • Pitch of the Roof: The slope or pitch of the roof impacts the amount of materials needed and the complexity of the job. Steeper roofs require more materials and safety precautions, increasing costs.
  • Accessibility: Easier access to a roof typically results in lower costs. Complicated setups requiring additional safety measures can drive up prices.
  • Materials: Choices range from asphalt shingles to metal or clay tiles. Each material has a different cost, with asphalt being the most economical and clay tiles being at the higher end of the spectrum.

Average Costs and Considerations

  • Asphalt Shingles: Most common and cost-effective, ranging from $5,000 to $12,000 for standard shingles. Premium versions can cost between $10,000 and $20,000.
  • Metal Roofing: More durable and long-lasting than asphalt, with costs between $15,000 and $30,000.
  • Clay and Slate Tiles: Offer a distinctive look with the highest durability, but can be as expensive as $60,000 depending on the roof size.

Regional Variations in Cost

  • The South: Typically the least expensive region for roofing, with costs as low as $2 per square foot.
  • The Midwest: Slightly higher than the South, generally between $3 and $5 per square foot.
  • The Mountain West and Northeast: These regions have higher costs due to the need for roofs that can support heavy snow loads, ranging from $5 to $9 per square foot.

Ensuring You Get a Good Deal

To ensure you’re getting a competitive price, it’s advisable to obtain multiple estimates. Consider different materials and ask for detailed quotes that include labor and materials. Consult with neighbors or friends for recommended contractors to ensure reliability and quality.

Conclusion

For homeowners considering a roof replacement, it’s crucial to understand the factors affecting costs and to choose materials wisely based on both budget and aesthetic preferences. At Trojan Roofing, we offer detailed consultations to help you make the best choice for your home’s needs and ensure your investment enhances your property’s value and safety.

For further insights into selecting the perfect roof color for your home, click here.

Factors to Consider When Selecting a Roof Color for Your Home

Choosing the Perfect Roof Color: A Strategic Approach

Selecting the right roof color is crucial as it not only affects the aesthetic appeal of your home but also has practical implications. Here are seven essential factors to consider when choosing your roof color.

1. Climate Impact

The color of your roof can significantly affect the temperature of your attic and, consequently, your home’s energy efficiency. Light colors reflect sunlight, making them ideal for warmer climates as they keep homes cooler. Dark colors absorb heat and are better suited for colder regions, helping to keep homes warm.

2. Complement Your Home’s Exterior

The roof color should complement the rest of your home’s exterior elements like bricks, siding, and stonework. For instance, a grey or blue house pairs well with a black or dark grey roof, whereas homes with cream or tan exteriors look best with brown or mixed brown and cream shingles.

3. Visual Effects on Home Size

The color of your roof can influence the perception of your home’s size. Light colors tend to make homes appear larger and more expansive, whereas dark colors can make a home seem smaller but more substantial.

4. Architectural Style

Consider whether you want your roof to stand out as a bold architectural feature or blend in for a more traditional look. The color you choose can significantly affect your home’s overall architectural expression.

5. Neighborhood Harmony

It’s important to adhere to any homeowners’ association guidelines and to consider the prevailing color schemes in your neighborhood. Aim for a roof color that complements the community while still allowing your home to retain its unique character.

6. Availability of Colors

Some roof colors may not be available in your area due to regional restrictions or supply issues. Check with your roofing provider to ensure your desired color is accessible before making a final decision.

7. Visualization Tools

Utilize online visualizer tools to preview how different roof colors will look on your home. Many roofing companies also offer sample colors you can view in person, which can help in making a more informed decision.

Conclusion

Choosing the right roof color involves a blend of aesthetic preferences and practical considerations. At Trojan Roofing, we understand the importance of a well-chosen roof color in enhancing your home’s appearance and efficiency. Our experts are here to guide you through the selection process to ensure your home looks its best.

For more insights into the benefits and comparisons of fiber cement siding versus vinyl, click here.

Fiber Cement Siding vs. Vinyl: Choosing the Ideal Siding Material

Comparing Popular Siding Options: Fiber Cement vs. Vinyl

When it comes to selecting siding for your home, two materials often come up as top choices: fiber cement and vinyl siding. Each offers unique advantages and caters to different homeowner needs. Understanding the distinctions between them can help you make an informed decision that aligns with both your aesthetic preferences and functional requirements.

Vinyl Siding: Affordability and Low Maintenance

Vinyl siding stands out for its cost-effectiveness and ease of maintenance. Here’s why it might be the right choice for your home:

  • Low Maintenance: Vinyl siding requires little upkeep beyond occasional cleaning, saving time and effort.
  • Variety of Styles: Available in a range of colors and styles, vinyl allows homeowners to achieve a desired look without compromising on budget.
  • Cost Efficiency: It is generally less expensive both in terms of materials and installation, making it a budget-friendly option for many.

Fiber Cement Siding: Durability and Customization

Fiber cement siding, while generally more costly upfront, offers excellent longevity and other key benefits:

  • Fire Resistance: Non-combustible material provides increased safety against fire hazards, offering peace of mind.
  • Aesthetic Flexibility: It can be painted, which means you can change the color over time to suit new style preferences.
  • Climate Resilience: Highly durable against various weather conditions, fiber cement maintains its integrity through extreme climates.

Detailed Comparison and Considerations

  • Durability: Fiber cement typically outlasts vinyl, resisting weather-induced wear and tear better and offering longer warranties.
  • Installation: Vinyl siding is easier and quicker to install, which can reduce overall project costs.
  • Environmental Impact: Fiber cement is made from sustainable materials and is recyclable, making it a more eco-friendly option compared to vinyl.

Making an Informed Decision

Choosing between fiber cement and vinyl siding involves considering several factors:

  • Budget: Determine how much you are willing to invest initially and over the life of the siding.
  • Aesthetic Goals: Decide what visual impact you want your siding to have on your home’s appearance.
  • Maintenance Willingness: Consider how much time and effort you are willing to dedicate to maintaining the siding.

At Trojan Roofing, we provide expert guidance to help you navigate these choices, ensuring you select the best siding material for your home’s specific needs.

For a step-by-step guide on how to effectively roof a house, click here.

Step-by-Step Guide on How to Roof a House

Roofing Your Home: A Comprehensive DIY Guide

Roofing a house is a significant undertaking that requires careful planning, the right materials, and attention to detail. This guide will walk you through the essential steps to roof your house effectively, ensuring a durable and weather-resistant finish.

Essential Materials and Tools

Before you begin, ensure you have all necessary materials and tools. For a typical asphalt shingle roof, you will need:

  • Asphalt shingles
  • Felt paper (No. 15 or No. 30)
  • Roofing nails
  • Roofing sealant
  • Self-adhesive waterproof underlayment
  • Drip edge
  • Flashing for vents and valleys

Required Tools:

  • Work gloves
  • Extension ladder
  • Utility knife
  • Chalk line
  • Caulk gun
  • Air hose or compressor
  • Roof harness
  • Roofing stapler/nailer
  • Hammer
  • Tin snips
  • Straight edge
  • Circular saw
  • Scaffolding
  • Tarpaulin

Permits and Preparations

Check local building codes for any permits required before you start. This ensures compliance and avoids penalties. Prepare your workspace by organizing tools and materials, ensuring safety measures like a roof harness are in place.

Step-by-Step Roofing Process

  1. Remove the Old Roof: Clear the old materials, ensuring you strip down to the bare deck. Dispose of debris responsibly.
  2. Install Underlayment: Lay down the self-adhesive waterproof underlayment. Ensure it’s smooth and covers the entire roof surface for optimal water resistance.
  3. Apply Tar Paper: Overlap sheets of felt paper to enhance waterproofing. Secure them with roofing nails.
  4. Install Flashing: Place metal flashing around roof valleys, vents, and edges to prevent water ingress.
  5. Lay Starter Shingles: These are crucial for the proper alignment of the rest of the shingles. Use a chalk line for precise placement.
  6. Shingle Installation: Work from the bottom up, overlapping shingles to prevent leaks. Follow the manufacturer’s guidelines for spacing and securing.
  7. Secure Shingles: Typically, four nails per shingle are sufficient, but in windy areas, six may be necessary.
  8. Cap the Ridge: Finish by capping the roof ridge for added protection and aesthetic appeal.
  9. Clean Up: Remove all debris, seal exposed nails with roofing sealant, and ensure everything is tight and secure.

Conclusion

Roofing your home can be a rewarding project that enhances your property’s value and protection. However, it requires significant effort and adherence to safety standards. If the task seems daunting, consider hiring a professional like Trojan Roofing, who can ensure the job is done safely and effectively.

For more detailed information on the differences between reroofing and roof replacement, click here.

Understanding the Differences Between Reroofing and Roof Replacement

Deciding Between Reroofing and Full Roof Replacement

Choosing whether to reroof or replace your roof entirely can be a significant decision, affecting both the cost and the lifespan of your roof. Here’s a detailed comparison to help guide you through the decision-making process.

What is Reroofing?

Reroofing is the process of layering one set of new shingles over a set of existing shingles. This method can only be performed once, meaning if your home already has two layers of shingles, reroofing is not an option. It’s typically faster and less costly than a full roof replacement.

  • Pros: Cost-effective; quicker installation.
  • Cons: Shorter lifespan; cannot be done if there are already two layers of shingles; not suitable for significant damage.

What is Roof Replacement?

Roof replacement involves removing all existing shingles, repairing any damaged roof deck, and installing new underlayment and shingles. This method is more thorough and extends the life of your roof.

  • Pros: Addresses underlying damages; longer lifespan; increases property value.
  • Cons: More expensive; more time-consuming.

Key Considerations for Each Method

  1. Condition of Your Current Roof:

    • Reroofing: Suitable for roofs with minor wear and tear.
    • Replacement: Necessary for roofs with extensive damage, multiple layers of shingles, or significant water damage.
  2. Cost:

    • Reroofing: Generally less expensive due to less labor and material cost.
    • Replacement: More costly upfront but can be more cost-effective in the long run due to less frequent repairs.
  3. Longevity and Performance:

    • Reroofing: Can extend the life of your roof for up to 10-15 years.
    • Replacement: Can last 20 years or more, ensuring a better ROI and peace of mind.
  4. Building Codes and Regulations:

    • Ensure compliance with local building codes which may affect the feasibility of reroofing based on the number of existing roof layers.

Making the Right Choice

When choosing between reroofing and a full roof replacement, consider the age of your current roof, the extent of any existing damage, and your budget. If you are unsure, consulting with a professional roofing contractor can provide clarity.

For homeowners in Indianapolis, Trojan Roofing offers expert roofing services, ensuring that whether you choose to reroof or replace your roof, it is done efficiently and effectively.

For further insights into installing roofing shingles in the Indianapolis area, click here.

Installing Roofing Shingles in the Indianapolis Area: A How-To Guide

Your Guide to Proper Shingle Installation

Installing new roofing shingles is a critical task that ensures the longevity and durability of your home’s roof. This step-by-step guide aims to assist homeowners in the Indianapolis area with the proper techniques for shingle installation, ensuring a leak-free and aesthetically pleasing result.

Preparation and Safety Measures

Safety should be your first priority. Ensure you have the proper gear: a hard hat, safety glasses, work gloves, and sturdy boots. Working with a partner is recommended for safety and efficiency.

Materials Needed

  • Asphalt shingles
  • Ice and water protector
  • Roofing underlayment
  • Roofing nails
  • Flashing
  • Drip edge
  • Hammer
  • Utility knife
  • Chalk line
  • Staple gun

Step 1: Roof Preparation

Before installing new shingles, remove all old shingles, flashing, and other materials. Use a roofing shovel and hammer to carefully remove these materials without damaging the roof deck.

Step 2: Install the Ice and Water Protector

Apply the ice and water protector at the eaves and rakes of the roof. This layer is crucial for preventing water infiltration, especially in the cold and wet climate of Indianapolis.

Step 3: Lay Down Underlayment

Roll out the underlayment over the entire roof, starting from the bottom up. Overlap each layer by at least 3-4 inches. Secure the underlayment with a staple gun, ensuring it lies flat and even.

Step 4: Apply Flashing

Install metal flashing around roof features such as chimneys, vents, and valleys. This helps direct water away from these vulnerable areas.

Step 5: Start with Starter Shingles

Begin at the bottom edge of the roof with starter shingles. These shingles are essential for ensuring subsequent rows are aligned correctly. Use a chalk line to maintain straight rows.

Step 6: Shingle Installation

Place shingles starting from the lower corner of the roof, working your way up and across. Secure each shingle with at least four nails. If you live in a particularly windy area, six nails may be necessary.

Step 7: Fit Shingles Around Vents and Pipes

Ensure vents and pipes are surrounded by rubber boots under the flashing, which prevents water leaks.

Step 8: Cap the Ridge

Finish the installation by capping the ridge with shingles that overlap both sides of the roof, providing additional protection against water ingress.

Conclusion

Properly installing roofing shingles is an exacting process that can significantly impact the longevity and effectiveness of your roof. If you’re in Indianapolis and unsure about tackling this project on your own, consider consulting with professional roofing contractors like Trojan Roofing who can ensure that the job is done right the first time.

For additional details on comparing roofing estimates, click here.

Comparing Roofing Estimates: What to Look For

Understanding the Details in Roofing Estimates

When the time comes for roof repair or replacement, getting and comparing multiple roofing estimates is essential for making an informed decision. This guide will help you understand the crucial elements of roofing estimates and what you should compare to choose the best option for your needs.

Key Components of a Roofing Estimate

  1. Materials Used: The estimate should clearly list the type and brand of materials for each component of the roof, including shingles, underlayment, and flashing. This ensures you are comparing similar quality across different estimates.
  2. Scope of Work: Detailed description of the work to be done is crucial. This includes whether it’s a repair or a full replacement, and the extent of the work anticipated.
  3. Warranties: Separate warranties for materials and workmanship should be specified. Make sure the warranties offered are adequate for your investment and understand how installation practices might affect them.
  4. Contractor Credentials: Verify that the roofing company is certified to install the specified materials and that they employ skilled workers who have undergone recent training.
  5. Cost Details: The estimate should break down the costs for materials, labor, and any potential additional fees. This breakdown helps in understanding where your money is going.
  6. Insurance and Licensing: Ensure that the roofing company carries the necessary insurance to protect you against liability. Confirm that they are licensed to perform roofing work in your area.
  7. Property Protection and Cleanup: The estimate should explain how the contractor will protect your property during the job and their cleanup procedures post-completion.
  8. Estimate Clarity and Professionalism: A professional estimate should be detailed, written, and presented in a clear format. Be wary of vague, verbal, or handwritten estimates.

Red Flags in Roofing Estimates

  • Too Vague: Lack of detail may indicate a lack of professionalism or an intent to charge for additional work later.
  • Suspiciously Low Prices: Extremely low bids may suggest that the contractor plans to cut corners or use inferior materials.
  • Lack of Inspection: Trustworthy contractors will insist on inspecting your roof before providing an estimate to ensure accuracy.
  • Non-specific Warranties: Vague warranty information can be a sign of future issues with claims.

Making the Best Choice

Armed with detailed and clear roofing estimates, you can make a more informed decision that balances cost, quality, and longevity. It’s advisable to not choose based solely on price but consider the overall value and reliability of the roofing contractor.

For homeowners in Indianapolis, Trojan Roofing is ready to provide a comprehensive and transparent estimate that meets your roofing needs. Trust our expert team to deliver high-quality work that stands the test of time.

For further information on the importance of professional roof inspections before winter, click here.

Importance of Professional Roof Inspection Before Winter

Why You Need a Roofer Before the Cold Sets In

Winter’s harsh conditions—snow, ice, and cold winds—can severely test the integrity of your roof. Conducting a professional roof inspection in the fall is crucial to identify and address any issues before they worsen in the winter months. Here’s why and how to ensure you choose the right professional roofer for this important task.

Benefits of a Pre-Winter Roof Inspection

  • Early Problem Detection: A thorough inspection can reveal hidden damages like minor leaks or areas weakened by previous storms, which might not yet be visible.
  • Cost Savings: Addressing issues before winter prevents more extensive and expensive repairs later on, especially when damage could be exacerbated by winter conditions.
  • Extended Roof Lifespan: Regular maintenance, including pre-winter inspections, can significantly extend the life of your roof, delaying the need for a full replacement.

Choosing a Competent and Ethical Roofer

  • Check Qualifications: Ensure the roofing contractor has the necessary certifications and training to perform high-quality work.
  • Experience and Local Establishment: Choose a well-established local company with a solid track record. Local companies are more accessible for follow-up service and are familiar with regional weather challenges.
  • Insurance and Worker’s Compensation: A reputable roofer will have comprehensive insurance and worker’s compensation to protect both their employees and your interests during the roofing project.
  • Permit Knowledge: Professional roofers should handle all necessary permits before starting any work, ensuring that all roofing work complies with local regulations.
  • Clear Estimates and Communication: Look for a roofer who provides a detailed estimate upfront and communicates clearly about any necessary adjustments as the work progresses.
  • Reasonable Payment Terms: Be cautious of roofers asking for full payment upfront. A deposit followed by payment upon completion is standard practice.
  • Solid Warranties: Ensure the roofer offers a substantial warranty on both materials and workmanship. Typical warranties should cover installation for several years and materials for up to 40 years.

Final Considerations

Hiring a professional roofer for a pre-winter inspection not only ensures that your roof is prepared to face the cold months but also provides peace of mind that your home is protected. For residents in Indianapolis, Trojan Roofing is a reliable option that meets these stringent criteria and is committed to the highest standards of roofing excellence.

For essential tips on maintaining your home’s exterior this fall, click here.

Essential Exterior Home Maintenance Tips for Fall

Prepare Your Home for Winter with These Crucial Steps

Fall is the ideal time to perform exterior home maintenance. The moderate weather provides the perfect conditions for inspecting and repairing your home to ensure it withstands the harsher winter months. Here are three key maintenance tasks to tackle this fall.

1. Clean the Rain Gutters

  • Importance: Leaves and debris accumulate in your gutters during fall, potentially clogging them. This can lead to water overflow, which might damage your foundation and siding.
  • Solution: Clear out the gutters or consider installing gutter guards to prevent debris from collecting, ensuring proper water drainage away from your home’s foundation.

2. Inspect and Seal Windows and Doors

  • Importance: Leaky seals around windows and doors can lead to increased heating bills and discomfort during cold weather.
  • Solution: Check and replace any failing caulk or weather stripping. Ensure seals are intact to maintain warmth and energy efficiency within your home.

3. Roof Inspection and Repair

  • Importance: Identifying and repairing roof damage, such as missing shingles or compromised flashing, is crucial before winter to prevent water damage and costly repairs.
  • Solution: Hire a professional to inspect the roof if you are not comfortable doing it yourself. Address any issues such as leaks, damaged shingles, or poor insulation immediately.

Choosing the Right Professionals

When selecting a contractor or maintenance service, consider the following:

  • Local Experience: Choose a well-established local company with knowledge of regional weather challenges.
  • Certifications and Insurance: Ensure they have the necessary qualifications and are adequately insured.
  • References and Reviews: Check online reviews or ask neighbors for recommendations to find reliable professionals.

For homeowners in Indianapolis, Trojan Roofing offers expert services that include free inspections and guaranteed workmanship. Contact us for assistance with your fall maintenance needs to ensure your home is ready for winter.

For insights into the timeless appeal of copper gutters for home investment, click here.